

Use any photo… your child’s photo, your family photo, a favourite photo… to make your own Bible poster (A4), Bible verse card (4×6), postcard (4×6) or jigsaw puzzle. Add your own Bible verse, borders and page title. Adapt for any theme. This post will walk you through step-by-step, to make it a masterpiece your child will treasure!
*
*
*

*

*
*

*

*

*

*

*
*
*
*
WHY MAKE YOUR OWN BIBLE POSTER?
- You are doing a theme package for your child and have found the perfect photo that would make a great Bible verse poster, postcard, or jigsaw. You just know your child will love it.
- You’ve just been on holidays and want to share a beach, some special scenery, a flower, an animal, or your perfect sunset photo with them.
- You have a new family photo to send to your sponsored child. Or you have just received your sponsored child’s photo and want to jazz it up and send it back to them.
- For any of these scenarios, you could have a go at jazzing your photo up yourself using a photo editing program like Photoshop, Gimp, or MS Publisher, and that’s what this tutorial is all about. Or you could use one of the wonderful free poster or photo editing sites online (scroll down to the end of this post, below the tutorial). This post will cover them, too.
*
*
*
*
GETTING STARTED
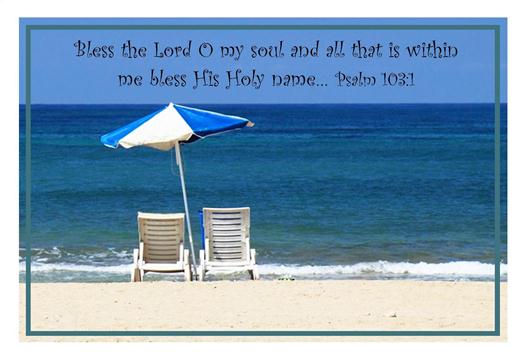
To start with, keep it simple. This is the poster we are going to make today. You will be able to download it at the end of this post. Once you get the hang of the basics, you will have lots of fun playing. A good tip is to choose a really good quality photo. See our FREE Bible posters for more ideas and inspiration. Okay, let’s get started…
*
*
*
*
*
*
DIY POSTER
1. CHOOSE YOUR PHOTO
Choose your photo and open it up in any photo manipulation program like MS Publisher, Gimp, or Photoshop. These instructions are specifically for MS Publisher. Set your page size (file – page setup) to A4 for a poster, or 4×6 for a postcard or verse card. Choose the orientation you want – portrait or landscape. Click okay. Adjust the size and position of your photo so that it is sitting nicely wherever you want it on your blank page.
*
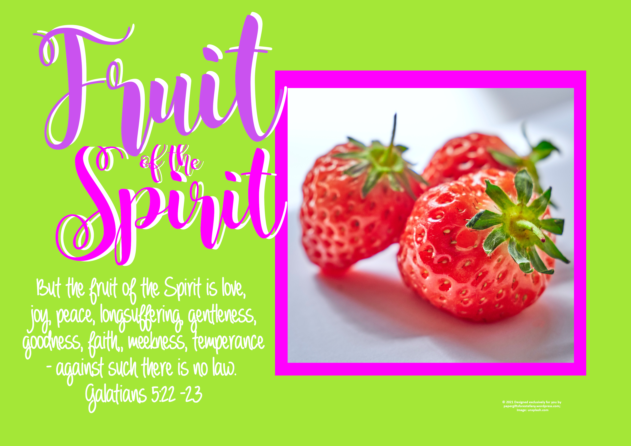
2. ADD A BIBLE VERSE
Insert a text box (insert – text box). Type in a favourite Bible verse. Choose your colour and font… like so. You could easily print it right here, but let’s see what else we can do.
*

*
3. ADD EXTRAS (optional)
If you want to add a title for your poster, or draw attention to a key word, insert a separate text box or word art. Choose your colour and font. Want a strip of colour, a different background, an embellishment, or a shape? Do it here. Think of it like cutting out different pieces of paper and shuffling them until you get the effect you are looking for. Your creativity is the limit! For this tutorial, I wanted to keep it simple, so no extras were added.
*
4. ADD A FRAME (optional)
There are different ways you can do this. You can attach the frame to the actual photo. Or you can have a separate frame that you can move around independently from the photo, and that will give you more flexibility.
Attach Frame: Use the formatting buttons at the top of your screen. Left click your photo first (to select it). At the top of your screen, click on the ‘line colour’ dropdown arrow, and click on the colour you want. If you want your frame to be an exact colour match to highlight something in your photo, and you have a ‘color picker’ tool, click on the tool, then on the precise colour you want from your photo.
~ OR ~
Attach Frame: Right click on the photo – select ‘format picture’ – click on the ‘colours and lines’ tab. Click on the dropdown arrow on the right hand side of the line – colour box. Choose the colour, weight, and style you want for your frame, then click okay.
~ OR ~
Separate Frame: Simply insert a rectangle shape inside or outside the edge of your photo. Choose your colour, weight and style. This will keep your frame separate to your photo, giving you more flexibility to move it around, and this is what I have done below. I also used my colour picker tool to select a colour from the water for my frame.
*
5. PRINT
You may need to play with all these stages a little until you get the precise effect you want. Check it in print preview to make sure, then print it. Use photo paper and laminate your masterpiece for a professional finish. That’s it! If you have any further questions about this process in MS Publisher, just ask! I would be happy to assist. And if you would like a copy of this finished sample poster / verse card for your own personal use, you can download it here… enjoy!
*
*
*
*
DIY POSTER ONLINE
Now let’s also have a look at some free DIY poster resources that are available online.
- DIY Bible Poster (wordofGod) Choose from one of their existing backgrounds (only). Choose your Bible verse – click the first down arrow to select ‘English’ and then what Bible verse you want. Click ‘add selected verse’, and select the colour of your text. You can add shapes if you want them. Preview your masterpiece at the bottom of the page and alter as required, then click ‘save as image’.
- Free Online Poster Maker (postermaker) make your own poster online; upload your own image or select from an existing background. Add text, shapes, special effects, borders, overlays, etc. Print when you are done.
- 20 Free Photo Editing Sites Online for more inspiration.
- Postcard Templates (printablepaper) | Large Postcard | Small Postcard | 4×6 Postcard | 3.5×5 Postcard | 4.25×5.5 Postcard | Postcard Back horizontal | Postcard Back vertical; various postcard templates; free printable
- Postcard Back (supercoloring) free printable
*
*
*
*
*
RELATED LINKS

FREE Bible bookmarks | Tutorial: Make your own Bookmarks

FREE Bible wallet cards | Tutorial: Make your own Bible wallet cards
Free Photo Editing Sites Online

*
*
*
*
*

*
*¨*•.ღ.•*¨*
Collect your FREE BONUS GIFTS when you sign up to follow me. What will they be? Click here to find out. If you like my work, please tell others and ‘like’ this page. Your kind comments make my day! You can also follow Paper Gifts for Estefany on…

*¨*•.ღ.•*¨*
*
*
*
*
*
*****

Pingback: Tutorial – Jazz up your Colouring pages | Paper Gifts for Estefany
Pingback: Gift Ideas… how about something free printable? | Paper Gifts for Estefany
Pingback: DIY Activity Book for Kids (or adults) | Paper Gifts for Estefany
Pingback: Turn Your Photo into a Colouring Page | Paper Gifts for Estefany
Pingback: Tutorial – Make your own Stationery | Paper Gifts for Estefany
Pingback: Tutorial ~ Make your own Note Cards | Paper Gifts for Estefany
Pingback: Jazz up your envelopes | Paper Gifts for Estefany
Pingback: FREE Bible Posters | Paper Gifts for Estefany
Pingback: Fun with Fonts | Paper Gifts for Estefany
Pingback: Tutorial: Make your own Board Game for Kids | Paper Gifts for Estefany
Pingback: Tutorial ~ Make your own Stickers | Paper Gifts for Estefany
Pingback: Jazz up your Bible Verses (Typography) | Paper Gifts for Estefany
Pingback: Fun with Photo Frames | Paper Gifts for Estefany
Pingback: Tutorial ~ Make your own Wallet Cards | Paper Gifts for Estefany
Pingback: Fabulous Photo Fun – 20 photo editing sites | Paper Gifts for Estefany
Pingback: Tutorial – Make your own Puzzles | Paper Gifts for Estefany