

Jazz up the colouring pages for your children. Combine or shrink your colouring pages to make a unique scene, add your own borders, a favourite Bible verse, page title, and clip art. Make it a masterpiece in just 4 easy steps and then print!
*
*

cutecolors.com
*
JAZZ UP YOUR COLOURING PAGES ~ AN EASY HOW-TO TUTORIAL
1. ADD A FRAME: Right click on any free printable border (or background) and save it to your computer. Open it up in a program like MS Publisher, Photoshop, or Open Office Draw. These instructions are for MS Publisher. Set page size to A4. Adjust the size and position of your frame so that it is sitting nicely inside your page… like so.

2. ADD A TITLE: Insert a text box or word art. Choose a title for your colouring page and type it in. Choose colour and font.
3. ADD A BIBLE VERSE: Insert a text box. Type in a favourite Bible verse to match your theme. Choose colour and font. Your page should now look something like this…

4. ADD YOUR COLOURING PAGE/S: Copy (CTRL + C) and paste (CTRL + V) your colouring page so that it fits nicely inside your border. Adjust the size and position of everything until it looks just right.
5. PRINT.

That’s it. Too easy. You’re really getting the hang of this. :)
*
*
*

*
*
ADDITIONAL TIPS
- TURN A PAGE BORDER INTO A PHOTO FRAME This tutorial is also how you turn a free printable page border into a free printable photo frame. Just add a photo instead of a colouring page.
- USE A FREE PRINTABLE PHOTO FRAME AS A PAGE BORDER Free printable photo frames are also great to use as a frame to jazz up your colouring pages.
- DIY PAGE BORDER Didn’t find a free printable border or photo frame you like? Make your own border. Choose your background. That can be a plain colour or a textured photo that you like. Insert a slightly smaller shape on top of your background. One smaller white rectangle sitting inside a larger coloured rectangle works really well, like the one above. Choose a border colour and thickness if you wish before moving onto step 2 above.
- JAZZ IT UP Insert a tiny touch of clip art (click ‘insert’ – ‘picture’). Imagine a discreet trail of animal footprints across your scene. Or some matching clip art next to your title. How about a butterfly or a ladybug sitting on a flower… your imagination and creativity is the limit.
- CREATE A BRAND NEW SCENE. Try putting 2 or 3 different colouring pages within your frame and shrink them down to create a brand new scene. You may need to play with it a little until it looks just right. For example, when I sent my kids a ladybug theme, I found a whole heap of separate, smaller ladybug colouring images and put them into a garden scene colouring page that I liked.
- INK COSTS The secret to keeping ink costs down, but still having your pages look fabulous is LOTS of white space. All you need is a tiny touch of colour to make your page a masterpiece.
- MAKE YOUR OWN STATIONERY. Instead of a colouring page, simply add a large text box inside your border and type out your letter. See my separate make your own stationery tutorial for more ideas and a free sample. Add a Bible verse and some clip art if you are feeling adventurous.

cutecolors.com
*
*
*
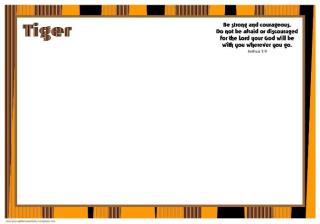
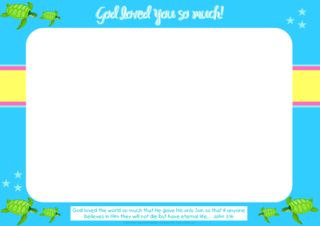
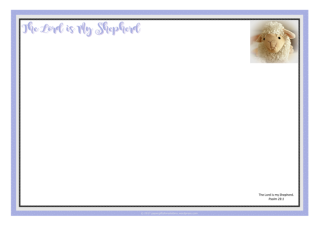
FREE COLOURING PAGE FRAMES FOR KIDS ~ FREE PRINTABLE
Here are some samples of colouring and puzzle page frames that I have done for my kids. You are welcome to download any of them. Click on the images and it will take you to the relevant posts with more freebies and ideas for that theme.
*
- Portrait


*
- Landscape


*
*
*
*
*
RELATED LINKS
DIY Poster | DIY Bookmark | DIY Wallet Cards | DIY Stationery | DIY Note Cards | DIY Stickers | DIY Puzzles | DIY Board Game | More DIY Tutorials

*
*
*
*¨*•.ღ.•*¨*
Collect your FREE BONUS GIFTS when you sign up to follow me. What will they be? Click here to find out. If you like my work, please tell others and ‘like’ this page. Your kind comments make my day! You can also follow Paper Gifts for Estefany on…

*¨*•.ღ.•*¨*
*
*
*
*
*****

Pingback: Tutorial ~ Make your own Puzzles | Paper Gifts for Estefany
Pingback: DIY Activity Book for Kids (or adults) | Paper Gifts for Estefany
Pingback: Tutorial – Make your own Stationery | Paper Gifts for Estefany
Pingback: Tutorial ~ Make your own Note Cards | Paper Gifts for Estefany
Pingback: Jazz up your envelopes | Paper Gifts for Estefany
Pingback: A ton of Bible Verses | Paper Gifts for Estefany
Pingback: Tutorial: Make your own Board Game for Kids | Paper Gifts for Estefany
Pingback: Tutorial – Make your own Puzzles | paper gifts for estefany